Rez Authors Guide
Matt Mower
Chapter 1: Creating Your First Game
Let’s start right at the beginning. We assume you have installed Rez and have an open terminal window in a folder where you’d like to create a new game.
> rez new first_game
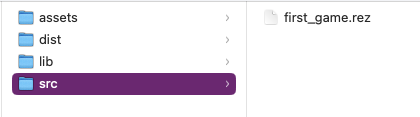
This creates a set of folders and puts some initial content into them. The only thing we really need to concern ourselves with is the contents of the src folder. In that we should find a file called first_game.rez. That is the main source file of our game.
> rez compile src/first_game.rez
This will build the HTML & Javascript to play the game. The resulting files are put into the dist folder. If you open dist/index.html in your browser you will be able to play the game.
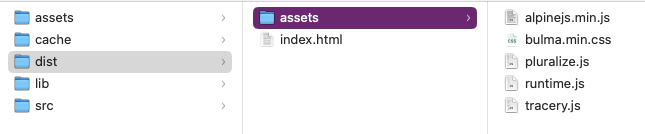
You will also notice an assets folder, under dist containing some Javascript and CSS files. These are automatically moved there from the main assets and referenced by the game files. Of particular interest is the runtime.js file which is the Javascript code for your game (as well as the Rez standard library).
First Steps In Writing
Open the first_game.rez file and delete everything after the comment %% The game proper begins here up to the final } that closes the @game element (delete lines 35-75 inclusive) (see step01).
Let’s start super simple: Putting something on screen. For that we’ll need the existing @game element (because every game needs one), a @scene (again, every game must have at least one) and a @card.
Cards are the main way that we put content on screen. They require a content: attribute that is written using plain HTML, though you also have the power of Bulma CSS and Apline.js (for styling & dynamic content) at your fingertips.
If you are familiar with Twine then a Rez @card is metaphorically equivalent to a Twine passage. Twine has no real equivalent to a Rez @scene which you can think of like a scene in a play or a movie. We’re not making use of it yet but different scenes can present an entirely different "stage" for the cards to play out on.
@scene s_first_scene {
  initial_card_id: #c_entrance
}

@card c_entrance {
  content: ```
  You are at the entrace to the castle. You experience a moment of... <span class="is_italic">trepidation</span>, do you want to go inside?
  ```
}
So we’ve added a scene #s_first_scene and told it that the first card it should present is #c_entrance. We use the cards content: attribute to write what we want to see on screen. It’s this simple at the beginning.
When writing content, we are writing HTML and most of the normal rules apply here, although <a> tags will look a little funny to you. In this case we use the Bulma style is_italic to format part of the text.
As an aside note the use of s_ as a prefix to the id of scenes and c_ as a prefix to the id of cards. When you start referring to ID’s elsewhere in the game you’ll be glad for adopting this kind of approach.
Now, before we make any more changes, re-compile. You’re going to get an error:
> Expected game/initial_scene_id to refer to a scene but the id 's_hello' was not found.
When we deleted the previous content we deleted the scene #s_hello that used to opening the game. We need to tell Rez about the new scene #s_first_scene we have replaced it with. Find the line:
initial_scene_id: #s_hello
This instructs the game which scene to start with, amend it to:
initial_scene_id: #s_first_scene
Now when you compile you should see:
rez v1.7.1 — compiled to dist folder
Load the dist/index.html file in the browser and you should see something like:

Congratulations, you are now an author with Rez!
Formatting with layouts
How a game presents its content is a very important topic for authors and Rez gives you a lot of control over this. We mentioned that a scene can present a kind of "stage" upon which a part of your game plays out.
A simple game might only use one scene but as your game grows more complex you might find need for a range of scenes. For example a character sheet, inventory, planetary survey, or NPC dialog might present very different kinds of interface and offer different kinds of interactions.
Scenes lend themselves very naturally and support the idea both of changing from one scene to another (for example moving from an introduction or tutorial to the main game) as well as interludes where you switch to another scene and then back again (presenting an inventory or character screen) maintaining the players place.
We’ll talk more about this later but for now let’s look at how scenes can present their own interface by specifying a layout: attribute. In the same way cards have content: which is HTML they present, scenes have layout: which is HTML that they present, wrapped around the content from their current card.
Change the file so that the content now looks like this (see step02):
@scene s_first_scene {
  initial_card_id: #c_entrance
  layout: ```
  <section class="hero">
    <div class="hero-body">
      <p class="title">${scene.current_card.description | capitalize}</p>
    </div>
  </section>
  ${content}
  ```
}

@card c_entrance {
  description: "castle entrance"
  content: ```
  You are at the entrace to the castle. You experience a moment of trepidation, do you want to <a card="c_courtyard">go inside</a>?
  ```
}

@card c_courtyard {
  description: "castle courtyard"
  content: ```
  You stand in a dank courtyard, it's cobbles overgrown with moss and littered with broken equipment.
  ```
}
Re-compile and reload the game in the browser. You’ll notice a few things.
First, we now have a link that takes us from the starting card to the second card. Rez links are specified using regular HTML <a> tags but with some possibly unfamiliar attributes. To load a new card you don’t use href='…', you use card='card_id'.
Second the scene itself is now presenting content directly via it’s layout: attribute. When you specify a custom layout you must include the ${content} expression somewhere because that contains the rendered content of the card (or cards) that the scene is presenting.
You can also add a layout: attribute to the @game itself. It works exactly the same way as a @scene layout and uses the ${content} expression to include the content being rendered by the current scene.
Using expressions and bindings
In this scene we’re also using a template expression to display the description: attribute defined by the scene’s current card. Scene layout can be a good way to present common content rather than duplicating this in the cards themselves.
Simple template expressions are of the form ${expression} where the expression starts with a binding. Bindings can look a little confusing at first but are actually a fairly simple concept: they give a name to something you want to refer to in a template expression.
Here’s a simple example: Every game has a single @game element with a title: attribute. At runtime this @game is represented by a Javascript object that stores the value of the title attribute. How can we refer to that object & value from a template?
That is where bindings come in, they associate a name with an object.
@card c_game_title {
  bindings: [
    game: #game
  ]

  content: ```
  This game is titled "${game.title}".
  ```
}
In practice you don’t need to make this specific binding because Rez automatically binds game, scene, card to the current @game, @scene, and @card elements respectively. You can make use of those straight away.
One role of a scene is to provide a layout and a context that can be shared among a number of different cards, making more complex UI easier to build. Scene’s do more than this as we’ll see later. But let’s expand on the layout theme a little. Let’s use a sidebar to display some information.
Multi-column layouts and sidebars
Fortunately Bulma makes this easy with its columns and column CSS classes.
Replace the existing #s_first_scene definition with this (see step03)
@scene s_first_scene {
  initial_card_id: #c_entrance
  blocks: [#c_sidebar]
  layout: ```
  <div class="columns">
    <div class="column is-one-fifth">${c_sidebar}</div>
    <div class="column">${content}</div>
  </div>
  ```
}

@actor player {
  name: "Adventurer"
  gold: 100
}

@card c_sidebar {
  bindings: [player: #player]
  content: ```
  <section class="section">
    <p class="is-size-5 has-text-weight-semibold">Name</p>
    <p class="">${player.name}</p>
  </section>
  <section class="section">
    <p class="is-size-5 has-text-weight-semibold">Gold</p>
    <p>${player.gold}</p>
  </section>
  <section class="section">
    <p class="is-size-5 has-text-weight-semibold">Location</p>
    <p>${scene.current_card.description | capitalize}</p>
  </section>
  ```
}
Note that the @scene now uses a blocks: attribute. This specifies the id of any additional cards we want to include within the game layout. Any card specified here gets rendered with the rendered content being bound to the same name in the bindings.
In this case #s_first_scene wants to render the content of #c_sidebar as well its current card. Rez renders the card so that you can include it in your template with a ${c_sidebar} expression within the layout.
The Scene layout is shared by the cards played into the scene. We don’t have to replicate it. Using different scenes is an easy way to have different parts of your game use a different layout and colour scheme.
Summary of Chapter 1
-
Rez is event-driven. What that means is that your game responds to events and then decides what to present to the player. For example clicking a link can generate the
cardevent that loads a new card. -
Rez is HTML based. You write using HTML markup. But it also has some conveniences, for example not requiring the
hrefattribute on<a>tags. -
You can include dynamically generated content using the
${…}template expression syntax. -
To load a different card we send the
cardevent, and to do that we use an HTML<a card='card_id'>element as shown in thecontent:attribute of the#c_entranceentrance and HTML data-attributes. -
You can add your own attributes to cards, scenes, and the game to do pretty much anything you can think of.
-
Scene layouts must include a
${content}template expression (the content of their current card gets bound tocontent) -
You can use
bindings:to refer to any game elements whose content you want to include in a template -
You can use
blocks:on a card, scene, or game to include the content from other cards in their template -
Scene layouts can use any legal HTML markup
Chapter 2: Using Scenes to Structure Your Game
We mentioned before that scenes create a very natural way to present a different kind of interface to the player.
If you think about the structure of a favourite novel, play, or film you are likely to find that it is composed of a series of interlinked scenes. Each scene may have a different backdrop, actors, and role in the story. Since these are linear mediums, we only experience each scene once.
You don’t have to make use of them (okay you have to have at least one) but Rez provides the concept of a scene which can be useful to help structure your game and also to vary the design/interface based on how you want the player to interact with it. Additionally because IF games are non-linear the player can experience the same scene more than once.
A @scene element can have its own attributes, including event handlers, and visual layout. This makes it convenient to manage the state of player interactions and to present a contextual interface to the player, as well as allowing scenes to respond in different ways to events.
We recommend that you use scenes liberally to break up your game and to put each scene in its own .rez source file, using the include macro %() to pull them all into the main source file. For example:
%(scenes/intro.rez)
%(scenes/character_sheet.rez)
%(scenes/inventory.rez)
%(scenes/dialog.rez)
You don’t have to make use of multiple scenes but there are very good reasons to do so and, as your game grows larger and more complex, you will be glad you did.
How Scenes Affect Layout
Because they can be used for a variety of different purposes, scenes support custom layout. In fact there are three levels of layout available to you.
-
The
@gameelement has alayout:attribute that is the "master" layout and is always present. -
A
@sceneelement has alayout:that is embedded within the game layout -
A
@cardelement has acontent:attribute that is embedded within the scene layout.
Game Layout
The default @game layout is:
${content}
What this means is that the game, by default, does not include any layout at all. The ${content} expression will render the current scene in place, i.e. it delegates layout to the scene.
But we could change this, perhaps to add a title banner that will be shared across all scenes.
@styles {
  .navbar.is-fixed-top {
    position: fixed;
    top: 0;
    left: 0;
    right: 0;
    z-index: 30;
  }

  body {
    padding-top: 3.25rem;
  }
}

@game {
  layout: ```
  <nav class="navbar is-fixed-top is-primary" role="navigation" aria-label="main navigation">
    <div class="navbar-brand">
      <div class="navbar-item">
        <h1 class="title has-text-white">${game.title}</h1>
      </div>
    </div>
  </nav>
  <section class="main-content is-fullheight">
    <div class="container">${content}</div>
  </section>
  ```
}
Now whichever scene the player is currently in, the game title will be displayed in a banner that is fixed in place.
The @game layout must always include the ${content} expression somewhere as this is where the scene content gets placed. Rez will try to warn you if you forget this.
Scene Layout
By default the @scene element also has an "empty" layout of:
${content}
In the case of a scene, the ${content} expression is the rendering of the current card (or cards, in the case of a stack layout. We’ll come back to those later.)
What this means is that in a new game there isn’t any layout provided at all, everything that is displayed comes from the @card elements. This means you have complete freedom to implement any kind of layout you like.
Let’s say you wanted a 3-column layout for an "exploration" scene, with status information in the left-column, actions in the right-column, and content in the centre column. How would you do that?
Here’s one way:
@scene s_exploration {
  blocks: [#c_sidebar #c_actions]
  layout: ```
  <div class="columns">
    <div class="column is-one-fifth">${c_sidebar}</div>
    <div class="column is-three-fifths"><div class="box">${content}</div></div>
    <div class="column is-one-fifth">${c_actions}</div>
  </div>
  ```
}

@card c_sidebar {
  content: ```
  Sidebar content goes here
  ```
}

@card c_actions {
  content: ```
  Action content goes here
  ```
}
This also introduces the concept of the blocks: attribute, available on @game, @scene, and @card elements. Composed of a list of @card ids it specifies blocks that should be pre-rendered and made available during the rendering process.
You can see that this scene specifies #c_sidebar and #c_actions and that these are then available as the expressions ${c_sidebar} and ${c_actions} respectively. That is, whenever you specify a block it will be rendered and put into a variable whose name is the id of the block.
As of Rez v1.3.2, user components represent an alternative and in many cases better way of handling this case. We’ll look at that later.
Changing The Scene
There are two ways of changing to another scene, you can switch or start an interlude.
When you switch scenes the old scene is discarded in favour of the new scene. Later you can switch back to the scene but it will have been reinitialized 'as new'.
When you start an interlude the old scene is kept in the background while the new scene plays out. Later you can resume and return to the previous scene, as it was when you left it.
Switching and interludes/resumes work just the same was as loading a new card. We use an <a> link:
<a scene="s_exploration">Explore</a>
<a interlude="s_inventory">Inventory</a>
<a resume>Close</a>
Summary of Chapter 2
-
Rez uses a scene/card metaphor to structure games.
-
Each scene can represent a distinct part of the game.
-
Each scene can have its own attributes, event handlers, and layout
-
Page layout composes the
@gameand@scenelayout and@cardcontent. -
When changing scenes you can switch or begin an interlude from which you can resume the previous scene.
-
Switch scenes using
<a scene="new_scene_id">Text</a> -
Interlude using
<a interlude="new_scene_id">Text</a> -
Resume the previous scene using
<a resume>Text</a> -
Layout can make use of a
blocks:attribute to include other cards pre-rendered.