Language Guide
Matt Mower
- Part 1: Getting Started
- Part 2: Core Concepts
- Part 3: Building Interactive Content
- Part 4: Advanced Features
- Part 5: Technical Reference
- Miscellaneous Topics
Part 1: Getting Started
What is Rez?
Rez is a language for creating choice-based HTML games/interactive fiction.
If you have ever wanted to build choice-based games with inventories, smart NPCs, and complex mechanics without fighting your tools, Rez may be for you.
Think of it as a powerful alternative to Twine. While Twine democratized interactive fiction creation and remains excellent for narrative-focused projects, more complex games push the limits and need a tool designed to support that complexity. This is where Rez comes into its own.
Rez uses an easy-to-learn declarative syntax and only requires Javascript for advanced features.
It makes it easy to build:
-
Rich NPCs with memory, behavior trees, and complex interactions
-
Dynamic inventories where a ring works differently on your hand vs in your backpack
-
Flexible layouts that adapt to different game requirements (combat, dialogue, exploration)
-
Procedural content that creates unique experiences on each playthrough
-
New mechanics that we didn’t think of
Rez sits between the simplicity of Twine and the complexity of parser-based systems like Inform while offering many of the benefits of both.
A Simple Example
Here’s a taste of what Rez code looks like:
@card greeting {
  visit_count: 0
  content: ```
  <p>Hello! This is visit number ${card.visit_count}.</p>
  <p><a card="greeting">Visit again</a></p>
  ```
  on_start: (card) => {
    card.visit_count += 1;
  }
}
This creates an interactive card that tracks how many times it’s been visited.
This tiny example demonstrates Rez’s core philosophy: clean separation between what the players see and what happens behind the scenes. Scale this approach up and you can build any choice-based game you can imagine.
Installation and Setup
To get started with Rez, you’ll need to have the Rez compiler installed on your system. Download the latest release for your operating system and install it. The installer will automatically download and install the compiler and its runtime dependencies for your platform.
Once the installer is complete you will have an executable named either rez_macos, rez_linux, or rez_windows.exe depending on your platform. Move or copy that executable into your path. The name of the executable doesn’t matter so you can rename it rez or rc (for rez compiler) as you like.
Once installed, you can create a new game project with:
rez new my_first_game --author-name="Your Name" --author-email="you@example.com" --game-title="My First Game"
This creates a folder called my_first_game with the following structure:
my-first-game/
├── src/
│   └── my-first-game.rez    # Your game source code
├── lib/
│   └── stdlib.rez           # Rez standard library (don't modify)
├── assets/                  # Images, sounds, etc.
└── dist/                    # Compiled game files (created on build)
The stdlib.rez file is contains a basic library of elements that Rez games can depend upon. You should not modify this file as it will be regenerated every time the rez compiler is run. When you upgrade to a newer version of Rez it will automatically install the newest standard library. You may put other Rez source files in the lib folder and they will not be interfered with.
Put any asset files you want to distribute with your game into the assets folder.
The dist folder will be recreated each time the Rez compiler runs and will contain a complete, ready to distribute, version of your game including all runtime files and used assets. You can package or upload this folder to share your game.
Once the compiler has run you may add other files or post process files in the dist folder but be aware any such changes may be overwritten the next time the compiler runs. The @pragma directive is designed to allow for extra processing steps in the compilation process. For example a @pragma could be used to convert graphics into different formats or minify files. This will ensure the step happens every time the compiler runs.
Your First Game
Let’s create a simple but complete game to understand the basics. Open src/my-first-game.rez and replace everything from @game onwards with:
@game {
  name: "treasure_hunt"
  title: "Treasure Hunt"
  author_name: "Matt Mower"
  author_email: "self@mattmower.com"
  game_homepage: "http://mattmower.com/"

  IFID: "12345678-1234-5678-9ABC-123456789ABC"
  archive_format: 1

  version: 1.0
  created: "2025-07-20 14:01:27.161254Z"

  initial_scene_id: #opening_scene
  layout: ```
  <section class="main-content is-fullheight">
    <section class="hero">
      <div class="hero-body">
        <p class="title">${game.title}</p>
        <p class="sub_title">a game by <a href="${game.game_homepage}">${game.author_name}</a></p>
      </div>
    </section>
    <div class="container">
      ${content}
    </div>
  </section>
  ```
}

@scene opening_scene {
  initial_card_id: #forest_entrance
}

@card forest_entrance {
  content: ```
  <p>You stand at the edge of a dark forest. A weathered sign reads "TREASURE WITHIN".</p>
  <p>What do you want to do?</p>
  <ul>
    <li><a card="enter_forest">Enter the forest</a></li>
    <li><a card="examine_sign">Examine the sign more closely</a></li>
  </ul>
  ```
}

@card enter_forest {
  content: ```
  <p>You push through the undergrowth and find yourself in a small clearing.
  In the center sits an old wooden chest!</p>
  <p><a card="open_chest">Open the chest</a></p>
  <p><a card="forest_entrance">Go back to the entrance</a></p>
  ```
}

@card examine_sign {
  content: ```
  <p>Looking closer at the sign, you notice small text at the bottom:
  "Beware the guardian of the treasure."</p>
  <p><a card="forest_entrance">Return to the entrance</a></p>
  ```
}

@card open_chest {
  bindings: [player: #player]
  content: ```
  $if(player.has_key) -> {%
    <p>Using the key, you open the chest and find a pile of gold coins!
    You win!</p>
    <p><a card="forest_entrance">Play again</a></p>
  %}
  () -> {%
    <p>The chest is locked tight. You need a key.</p>
    <p><a card="search_area">Search the area for a key</a></p>
    <p><a card="enter_forest">Go back</a></p>
  %}
  ```
}

@card search_area {
  content: ```
  <p>You search around the clearing and find a rusty key hidden under some leaves!</p>
  <p><a card="open_chest">Try the key on the chest</a></p>
  ```
  on_start: (card) => {
    $player.has_key = true;
  }
}

@actor player {
  $global: true
  has_key: false
}
|
Note
|
Notice the |
Compiling and Running the Game
From the my_first_game folder run:
➜ rez compile src/my_first_game.rez
rez v1.8.15 — compiled to dist folder
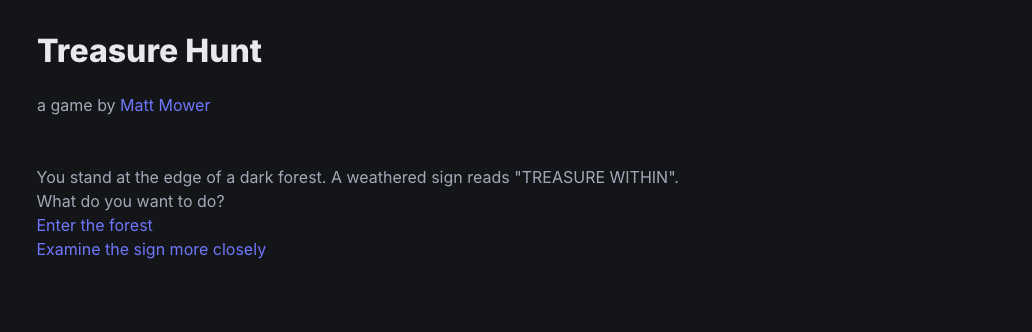
Then open the dist/index.html file. There’s a version online and it should look like:
Distributing Your Game
Package the contents of the dist folder in any way you like.
Understanding the Structure
Let’s break down what we just created:
@game: The top-level container that defines the game’s metadata and overall layout. Every Rez game needs exactly one @game` element and it always has the id #game. It must also have an attribute initial_scene_id that refers to the scene that starts the game.
@scene: A context where interactions take place, can have a layout (for example a dialogue scene might use a different layout to an inventory scene). Each scene has an initial_card_id that defines which @card` gets presented first when that scene starts. You can have one scene or many scenes.
@card: The content that players mostly see and interact with. Cards contain the text, choices, and behaviors that make up your game. It must have a content: attribute containing a template (HTML markup and Rez template expressions) that determines what the player will see.
The structure flows like this:
@game layout
  └── @scene layout
      └── @card content
Compilation and Testing
To build your game, run:
rez compile src/my-first-game.rez
This creates the compiled game in the dist/ folder. Open dist/index.html in a web browser to play your game.
The compilation process:
-
Reads your
.rezsource files -
Converts them to JavaScript objects
-
Creates an HTML page with embedded JavaScript
-
Copies any assets to the distribution folder
Next Steps
Now that you have a working game, you can:
-
Add more cards and scenes to expand the story
-
Include images and other assets
-
Add dynamic behavior with JavaScript
-
Experiment with different layout modes
In the next section, we’ll dive deeper into the core concepts that make Rez games work.
Part 2: Core Concepts
Understanding Elements
Rez games are built from elements - the building blocks that define everything in your game. Elements represent things like the game itself, scenes, cards, characters, items, and more. Rez has a number of useful elements built in and you can also create your own when you need to.
Every element follows the same basic pattern. It starts with an @ symbol that says "we’re declaring an element", this is followed by the element name (e.g. game), then a matched pair of braces {} inside which are attributes that define that element. So:
@element_name unique_id {
  attribute_name: value
  another_attribute: another_value
}
For example:
@item magic_sword {
  name: "Enchanted Blade"
  damage: 15
  magic: true
}
The Three Essential Elements
Every Rez game uses three core elements (@game, @scene, and @card) and if you wanted to you could build your entire game with just these three elements.
@game - The overall game container that holds game metadata and the "master" layout.
@game {
  name: "adventure"
  title: "Sandbags Mythical Adventure"
  initial_scene_id: #sc_opening
  author: "Matt Mower"
  author_email: "self@mattmower.com"
  layout: ```
    <section class="hero">
      <div class="hero-body">
        <p class="title">${game.title}</p>
        <p class="subtitle">By ${game.author}</p>
      </div>
    </section>
    ${content}
  ```
}
The @game element is the only element where you don’t specify the element id, it always #game and you can’t change it. Every other element you will give an id yourself.
@scene - A context for a kind of player interaction that can have its own layout. You can write your entire game in one scene, or use as many as you like to present content appropriately in that context. For example different scenes might a different number of columns, font choices, colours and so on.
@scene opening {
  initial_card_id: #start_here
  blocks: [sidebar: #sidebar]
  layout: ```
    <div class="columns-2">
      <div class="column">${sidebar}</div>
      <div class="column">${content}</div>
    </div>
  ```
}
@card - Content that players see and interact with, presented within a scene. If you are familiar with Twine then a @card is roughly equivalent to a Twine passage.
@card start_here {
  content: ```
  <p>Your adventure begins...</p>
  <p><a card="next_card">Continue</a></p>
  ```
}
The layout: attribute of the game and its scenes and the content: attribute of cards are where you put the HTML markup that is shown to the player.
Element Unique Identifiers
Every game element must have a unique id by which it can be referenced.
In Rez element ids follow the JavaScript rules for naming identifiers:
-
Start with a letter, underscore, or dollar sign
-
Can contain letters, numbers, underscores, or dollar signs
-
Cannot contain spaces or special characters
-
Are case-sensitive
Good IDs: forest_entrance, magic_sword, npc_wizard, scene1
Bad IDs: forest entrance, magic-sword, 123start, npc@wizard
Understanding Attributes
Attributes are how you describe an element’s properties and behavior. They use the format name: value with a required space after the colon.
@card treasure_room {
  title: "The Treasure Chamber"      // String
  visited: false                     // Boolean
  gold_count: 100                    // Number
  room_type: :treasure               // Keyword (symbol)
  owner_id: #dragon                  // Element reference
  content: ```                       // Template (multi-line string)
  <p>A room filled with gold!</p>
  ```
  on_enter: (card) => {              // Event script function
    card.visited = true;
  }
  refill_gold: function() {          // Action script function
    this.gold_count = 100;
  }
}
Attribute Types
Strings - Text enclosed in double quotes
description: "A rusty old key"
Numbers - Integers or decimals
damage: 15
weight: 2.5
price: -10
Booleans - True or false values
magic: true
cursed: false
found: yes      // yes/no also work
hidden: no
Keywords - Symbols starting with a colon, useful for categories
material: :gold
rarity: :legendary
type: :weapon
Element References - Point to another elements by referencing it’s id #
owner_id: #player
location_id: #forest
wielded_by_id: #hero
|
Important
|
The @scene forest {
initial_card_id: #entrance // You define this
// Rez automatically creates:
// initial_card -> the actual RezCard object
}
@actor hero {
location_id: #forest // You define this
// Rez automatically creates:
// location -> reference to the object with ID #forest
}
This means you can use both |
Templates - Multi-line content with dynamic expressions
content: ```
<p>Welcome, ${player.name}!</p>
<p>You have ${player.gold} gold coins.</p>
```
Lists - Collections of values (space-separated, no commas)
colors: [:red :green :blue]
numbers: [1 2 3 4 5]
names: ["Alice" "Bob" "Charlie"]
items: [#sword #shield #potion]
Event Scripts - JavaScript functions for handling events
on_use: (item) => {
  player.health += 10;
  return RezEvent.playCard("feeling_better");
}
Event script functions are written as arrow functions and passed the event receiving object as their first parameter.
Action Script - Javascript functions for performing behaviours
use: function() {
  this.uses -= 1;
}
Action script functions are written in the standard Javascript function format
and utilise this as a reference to the object whose action script is being
executed.
|
Tip
|
Event Response Methods: Event scripts must use RezEvent to specify what happens as a result of the event:
Methods can be chained: |
Dynamic Properties
Dynamic properties are attributes that calculate their value each time they’re accessed, rather than storing a fixed value. They’re perfect for derived stats, percentages, and values that depend on other attributes.
Basic Dynamic Properties
Use ^p{…} to define a property that recalculates automatically:
@actor hero {
  first_name: "Sir"
  last_name: "Galahad"

  // This calculates every time it's accessed
  full_name: ^p{
    return `${this.first_name} ${this.last_name}`;
  }

  health: 85
  max_health: 100

  // Perfect for UI elements like health bars
  health_percentage: ^p{
    return this.health * 100 / this.max_health;
  }

  // Boolean states based on other attributes
  is_healthy: ^p{
    return this.health > this.max_health * 0.5;
  }

  is_at_full_health: ^p{
    return this.health >= this.max_health;
  }
}
Practical Examples
Dynamic properties shine for calculated stats:
@actor character {
  strength: 15
  dexterity: 12
  intelligence: 14

  // Calculated modifier (D&D style)
  strength_modifier: ^p{
    return Math.floor((this.strength - 10) / 2);
  }

  dex_modifier: ^p{
    return Math.floor((this.dex - 10) / 2);
  }

  // Total of all stats
  total_stats: ^p{
    return this.strength + this.dexterity + this.intelligence;
  }

  // Armor class calculation
  base_armor: 10
  armor_bonus: 2
  armor_class: ^p{
    return this.base_armor + this.dex_modifier + this.armor_bonus;
  }
}
For inventory and resource management:
@actor player {
  gold: 150
  silver: 75
  copper: 200

  // Total wealth in copper pieces
  total_wealth: ^p{
    return this.copper + (this.silver * 10) + (this.gold * 100);
  }

  current_weight: 45
  max_carrying_capacity: 100

  // How much more can be carried
  carrying_capacity_remaining: ^p{
    return Math.max(0, this.max_carrying_capacity - this.current_weight);
  }

  // Whether player is overloaded
  is_encumbered: ^p{
    return this.current_weight > this.max_carrying_capacity;
  }
}
When Properties Recalculate
Dynamic properties recalculate every time they’re accessed. This means:
-
When displayed in templates:
${player.health_percentage} -
When used in conditions:
$if(player.is_healthy) -
When accessed in JavaScript:
player.total_stats
The calculation runs fresh each time, so changes to underlying attributes automatically update derived values.
|
Tip
|
Dynamic properties are ideal for:
Avoid using them for expensive calculations that don’t change often - use regular attributes for those. |
Basic Content and Templates
The content attribute is where you define what players actually see. It uses templates that can include both static text and dynamic expressions.
Static Content
Simple text and HTML:
@card welcome {
  content: ```
  <h2>Welcome to the Adventure!</h2>
  <p>You are standing in a medieval village square.</p>
  ```
}
Dynamic Content with Expressions
Use ${…} to include dynamic values:
@card status {
  content: ```
  <h3>Character Status</h3>
  <p>Name: ${player.name}</p>
  <p>Level: ${player.level}</p>
  <p>Health: ${player.health}/${player.max_health}</p>
  ```
}
Note that expressions cannot be arbitrary pieces of Javascript so ${player.level + 1} while it will compile, is not a valid expression.
The player reference comes from bindings - you tell Rez which game objects to make available in templates:
@card status {
  bindings: [player: #main_character]
  content: ```
  <p>Name: ${player.name}</p>
  ```
}
Bindings flow down so that any binding made in the @game is available in the current @scene or @card, likewise bindings in the @scene are available in the current card.
Default Bindings
Some bindings are always available:
-
card- The current card being displayed -
scene- The current scene -
game- The game object
@card example {
  visit_count: 0
  content: ```
  <p>This card has been visited ${card.visit_count} times.</p>
  ```
}
Navigation Between Cards
Rez provides several ways to move between cards and scenes:
Playing a Card
Use <a card="card_id"> to switch to another card in the same scene:
<a card="forest_clearing">Enter the forest</a>
This is a syntax sugar for the full form:
<a data-event="card" data-target="forest_clearing">Enter the forest</a>
You need to use the full form if returning links from user components.
Switching Scenes
Use <a scene="scene_id"> to start a new scene:
<a scene="dungeon_entrance">Enter the dungeon</a>
This is a syntax sugar for the full form:
<a data-event="switch" data-target="dungeon_entrance">Enter the dungeon</a>
You need to use the full form if returning links from user components.
Scene Interludes
Use <a interlude="scene_id> and <a resume> to run a scene interlude.
Sometimes mid-scene we find a need to go to another scene temporarily. This is very common for things like NPC conversation or combat, shops/trading or inventory management, presenting history or other details, or for mini-games.
Using an interlude we 'put a bookmark' in the current scene, switch another scene, and then use the bookmark to find our place in the original scene and continue where we left off.
<a interlude="conversation">Talk to the Hermit</a>
When the user clicks an <a resume> link the interlude scene goes away and the original scene is resumed from the point where the player left it.
These are syntax sugar for the full forms:
<a data-event="interlude" data-target="conversation">Talk to the Hermit</a>

<a data-event="resume">...</a>
Event Links
Trigger custom behavior with <a event="event_name">:
@card magic_door {
  locked: true
  content: ```
  <p>A mysterious door blocks your path.</p>
  $if(card.locked) {%
    <a event="try_key">Try to unlock with the key</a>
  %}, {%
    <a card="beyond_door">Go through the door</a>
  %}
  ```
  on_try_key: (card) => {
    if(player.has_item("magic_key")) {
      card.locked = false;
      return RezEvent.flash("The key works! The door swings open.");
    } else {
      return RezEvent.flash("You don't have the right key.");
    }
  }
}
|
Tip
|
A big part of keeping your game managable is making good decisions about where to store the different properties that describe the 'world model'. Sometimes it is okay to put it in the nearest card but in different situations it might be more appropriate to put it elsewhere. Obvious places are the player (if you have one) or the game. However both of these can end up "stuffed" with properties relating to the world or puzzles you are setting up for the player. Sometimes you can ameliorate this with comments but often the answer is to find a better place. For example you might think about using a @object magic_door {
locked: true
description: "mysterious door"
}
If there were multiple ways that this door could be unlocked then having it contained in its own object could make a lot of sense and be much easier to understand later on. |
Buttons
You can also use buttons instead of links:
<button card="next_scene">Continue Adventure</button>
<button event="cast_spell">Cast Fireball</button>
Custom Components
Rez allows you to create reusable HTML components using @component. Components are JavaScript functions that return formatted HTML and can accept parameters, making them perfect for complex UI elements that you use repeatedly.
Basic Component Syntax
@component component_name (bindings, assigns, content) => {
  // JavaScript code that returns HTML string
  return `<div>Custom HTML here</div>`;
}
Simple Self-Closing Component
@component health_bar (bindings, assigns, content) => {
  const current = assigns.current || 0;
  const max = assigns.max || 100;
  const percentage = Math.round((current / max) * 100);

  return `
    <div class="health-bar">
      <div class="health-fill" style="width: ${percentage}%"></div>
      <span class="health-text">${current}/${max}</span>
    </div>
  `;
}
Use it in templates with dot notation as a self-closing tag:
content: ```
<.health_bar current="${player.health}" max="${player.max_health}" />
```
Container Component with Content
Components can also wrap content like regular HTML tags:
@component info_panel (bindings, assigns, content) => {
  const title = assigns.title || "Information";
  const type = assigns.type || "default";

  return `
    <div class="info-panel info-panel--${type}">
      <h3 class="info-panel__title">${title}</h3>
      <div class="info-panel__content">
        ${content}
      </div>
    </div>
  `;
}
Use it as a container with dot notation:
content: ```
<.info_panel title="Combat Status" type="warning">
  <p>You are in combat with ${enemy.name}!</p>
  <p>Your health: ${player.health}</p>
</.info_panel>
```
Advanced Component with Logic
Components can include complex logic and conditionals:
@component inventory_slot (bindings, assigns, content) => {
  const item = assigns.item;
  const index = assigns.index;
  const isEmpty = !item;

  if (isEmpty) {
    return `
      <div class="inventory-slot inventory-slot--empty" data-slot="${index}">
        <div class="slot-placeholder">Empty</div>
      </div>
    `;
  }

  const rarity = item.rarity || "common";
  const quantity = item.quantity > 1 ? `<span class="quantity">${item.quantity}</span>` : "";

  return `
    <div class="inventory-slot inventory-slot--${rarity}" data-slot="${index}">
      <img src="${item.icon}" alt="${item.name}" class="item-icon">
      <div class="item-name">${item.name}</div>
      ${quantity}
      <div class="item-tooltip" data-tooltip="${item.description}"></div>
    </div>
  `;
}
Component Parameters
Components receive three parameters:
-
bindings- All bindings available in the current context (player, scene, etc.) -
assigns- Attributes passed to the component via HTML attributes -
content- HTML content between opening and closing tags (for container components)
When to Use Components
Components are ideal for:
-
Repeated UI patterns - health bars, inventory slots, dialog boxes
-
Complex widgets - skill trees, character sheets, mini-maps
-
Conditional rendering - different layouts based on game state
-
Dynamic content - procedurally generated elements
-
Reusable game mechanics - card displays, battle interfaces
|
Tip
|
Keep components focused on presentation logic. For game logic, use element methods and events instead. Components work best when they transform data into HTML,rather than modify the game state. |
A Complete Example
Let’s build a simple character creation scene:
@scene character_creation {
  initial_card_id: #choose_name
  layout: ```
  <div class="creation-scene">
    <h2>Create Your Character</h2>
    ${content}
  </div>
  ```
}

@card choose_name {
  content: ```
  <p>What is your character's name?</p>
  <input type="text" rez-bind="player.name" placeholder="Enter name">
  <p><button card="choose_class">Next: Choose Class</button></p>
  ```
}

@card choose_class {
  bindings: [player: #player]
  content: ```
  <p>Hello, ${player.name}! Choose your class:</p>
  <ul>
    <li><a event="choose_warrior">Warrior (Strong and tough)</a></li>
    <li><a event="choose_mage">Mage (Wise and magical)</a></li>
    <li><a event="choose_thief">Thief (Quick and sneaky)</a></li>
  </ul>
  ```
  on_choose_warrior: (card) => {
    player.class = "warrior";
    player.strength = 15;
    player.sneak = 5;
    player.magic = 5;
    return RezEvent.playCard("creation_complete");
  }
  on_choose_mage: (card) => {
    player.class = "mage";
    player.strength = 5;
    player.sneak = 5;
    player.magic = 15;
    return RezEvent.playCard("creation_complete");
  }
  on_choose_thief: (card) => {
    player.class = "thief";
    player.strength = 5;
    player.sneak = 15;
    player.magic = 5;
    return RezEvent.playCard("creation_complete");
  }
}

@card creation_complete {
  bindings: [player: #player]
  content: ```
  <h3>Character Created!</h3>
  <p><strong>Name:</strong> ${player.name}</p>
  <p><strong>Class:</strong> ${player.class}</p>
  <p><strong>Strength:</strong> ${player.strength}</p>
  <p><strong>Magic:</strong> ${player.magic}</p>
  <p><button scene="game_start">Begin Adventure!</button></p>
  ```
}

@actor player {
  $global: true
  name: ""
  class: ""
  strength: 5
  magic: 5
  sneak: 5
}
This example demonstrates:
-
Multiple cards working together
-
Form input with
rez-bind -
Event handlers that modify game state
-
Dynamic content based on character attributes
-
Navigation between cards and scenes
Part 3: Building Interactive Content
Advanced Templating
Rez templates support more than just simple variable substitution. You can create dynamic content that responds to game state, user choices, and changing conditions.
Conditional Content
Use $if() expressions to show content based on conditions:
@card tavern {
  bindings: [player: #hero]
  content: ```
  <h3>The Rusty Dragon Tavern</h3>

  $if(player.gold >= 10) -> {%
    <p>You have enough gold for a meal and room.</p>
    <button event="buy_room">Rent a room (10 gold)</button>
  %}
  () -> {%
    <p>You're too poor to afford a room here.</p>
    <button event="work_for_gold">Offer to work for gold</button>
  %}

  $if(player.level >= 5) -> {%
    <p>The bartender nods respectfully at such an experienced adventurer.</p>
  %}
  ```
}
You can chain conditions:
$if(player.health <= 0) -> {%
  <p>You have died!</p>
%}
(player.health < 20) -> {%
  <p>You are badly wounded.</p>
%}
() -> {%
  <p>You feel healthy and strong.</p>
%}
Iterating Over Collections
Use $foreach() to loop through lists or arrays:
@card inventory {
  bindings: [
    player: #hero,
    items: () => $("hero").inventory.items
  ]
  content: ```
  <h3>Your Inventory</h3>

  $if(items.length > 0) {%
    <ul>
    $foreach(item: items) {%
      <li>${item.name} - ${item.description}</li>
    %}
    </ul>
  %}, {%
    <p>Your inventory is empty.</p>
  %}
  ```
}
With separators between items:
$foreach(skill: player.skills) {%
  ${skill.name}: Level ${skill.level}
%}, {%
  <br>
%}
Advanced Bindings
Bindings make data available to your templates. You can create different types of bindings:
Element Bindings - Reference game objects:
bindings: [
  player: #main_character,
  location: #current_room,
  villain: #dark_lord
]
Function Bindings - Calculate values dynamically:
Function bindings receive three arguments: (block, source, bindings) where:
-
block- theRezBlockview block being rendered -
source- the game element (e.g.RezCard) that owns the template -
bindings- the bindings resolved so far (earlier entries in the list are already present)
bindings: [
  total_score: (block, source, bindings) => {return bindings.player.experience + bindings.player.gold},
  random_event: (_block, _source, _bindings) => {return Math.random() < 0.3},
  available_exits: (_block, source, _bindings) => {return source.getExits()}
]
Dependent Bindings - Bind to attributes of another binding:
bindings: [
  player: #player
  player_name: player.name
  current_health: player.health
]
Value Bindings - If you want you can bind directly to a value:
bindings: [
  options: 2
]
This can be useful if you want to give a name to a transient value you are using in an expression. Note that such expressions can only be simple values such as numbers and strings, or lists of such values. You use complex attributes or arbitrary expressions like 2+2.
Forms and User Input
Rez makes it easy to capture user input through HTML forms with two-way data binding.
Text Input
Use the rez-bind={id.attr} syntax to create a two way binding between a text input and a compatible attribute. In this example
we bind player.name to a text input and player.background to a textarea. The form field will initially take on the value of
the attribute. Changes to the form field will be transparently applied to the attribute.
@card character_setup {
  bindings: [player: #player]
  content: ```
  <h3>Character Setup</h3>

  <label>Character Name:</label>
  <input type="text" rez-bind="player.name" placeholder="Enter your name">

  <label>Background Story:</label>
  <textarea rez-bind="player.background" rows="4"></textarea>

  <button card="choose_stats">Continue</button>
  ```
}
Checkboxes and Choices
Similarly you can use rez-bind to bind checkboxes to boolean attribute values.
@card preferences {
  bindings: [settings: #game_settings]
  content: ```
  <h3>Game Preferences</h3>

  <label>
    <input type="checkbox" rez-bind="settings.sound_enabled">
    Enable Sound Effects
  </label>

  <label>
    <input type="checkbox" rez-bind="settings.difficulty_hard">
    Hard Difficulty Mode
  </label>
  ```
}
Radio buttons for exclusive choices:
<h4>Choose your weapon:</h4>
<label>
  <input type="radio" name="weapon" value="sword" rez-bind="player.starting_weapon">
  Sword (+3 Attack)
</label>
<label>
  <input type="radio" name="weapon" value="bow" rez-bind="player.starting_weapon">
  Bow (+2 Attack, +1 Range)
</label>
<label>
  <input type="radio" name="weapon" value="staff" rez-bind="player.starting_weapon">
  Staff (+1 Attack, +2 Magic)
</label>
Select Dropdowns
For choosing from many options:
<label>Starting Location:</label>
<select rez-bind="player.hometown">
  <option value="village">Peaceful Village</option>
  <option value="city">Bustling City</option>
  <option value="forest">Forest Dwelling</option>
  <option value="mountain">Mountain Keep</option>
</select>
Event-Driven Forms
Use rez-live to trigger events when form values change:
@card dynamic_stats {
  content: ```
  <h3>Allocate Stat Points</h3>
  <p>Points remaining: ${card.points_remaining}</p>

  <label>Strength:
    <input type="range" min="1" max="20" rez-bind="player.strength" rez-live>
  </label>

  <label>Intelligence:
    <input type="range" min="1" max="20" rez-bind="player.intelligence" rez-live>
  </label>
  ```

  points_remaining: 20

  on_input: (card, event) => {
    const total = player.strength + player.intelligence;
    card.points_remaining = 20 - total;
    return RezEvent.render();
  }
}
Assets and Media
Add images, audio, and other media to your games using the asset system.
Defining Assets
Create asset elements to register your media files:
@asset hero_portrait {
  file: "characters/hero.png"
  width: 150
  height: 200
}

@asset background_music {
  file: "audio/tavern_theme.mp3"
}

@asset treasure_sound {
  file: "audio/treasure_found.wav"
}
Using Images
Display images in your content:
@card character_sheet {
  content: ```
  <h3>Character Information</h3>
  <div class="character-display">
    <.img name="hero_portrait" class="character-image" />
    <div class="character-stats">
      <p><strong>Name:</strong> ${player.name}</p>
      <p><strong>Level:</strong> ${player.level}</p>
    </div>
  </div>
  ```
}
Or build your own image tags:
<img src='${"hero_portrait" | asset_path}' alt="Hero Portrait" class="portrait">
Dynamic Assets
Choose different assets based on game state:
@card location_view {
  bindings: [
    location_image: () => {
      if (player.location === "forest") return "forest_scene";
      if (player.location === "dungeon") return "dungeon_scene";
      return "default_scene";
    }
  ]
  content: ```
  <div class="location-display">
    <img src='${location_image | asset_path}' alt="Current Location">
    <p>${location.description}</p>
  </div>
  ```
}
Audio Integration
While audio isn’t fully integrated yet, you can add it manually:
@card victory {
  content: ```
  <h2>Victory!</h2>
  <p>You have defeated the dragon and claimed the treasure!</p>
  <audio autoplay>
    <source src='${"victory_music" | asset_path}' type="audio/mpeg">
  </audio>
  ```
}
Building a Complete Interactive Scene
Let’s create a combat system that demonstrates advanced templating and dynamic content:
@scene combat {
  initial_card_id: #combat_start
  enemy_id: #goblin
  bindings: [
    player: #player
    enemy: scene.enemy
  ]
  layout: ```
  <div class="combat-scene">
    <h2>Combat!</h2>
    ${content}
  </div>
  ```
}

@card combat_start {
  content: ```
  <div class="combat-status">
    <div class="combatant">
      <h4>${player.name}</h4>
      <div class="health-bar">
        <div class="health-fill" style="width: ${player.health_perc}%"></div>
      </div>
      <p>Health: ${player.health}/${player.max_health}</p>
    </div>

    <div class="vs">VS</div>

    <div class="combatant">
      <h4>${enemy.name}</h4>
      <div class="health-bar">
        <div class="health-fill" style="width: ${enemy.health_perc}%"></div>
      </div>
      <p>Health: ${enemy.health}/${enemy.max_health}</p>
    </div>
  </div>

  <div class="combat-actions">
    <h4>Choose your action:</h4>
    <button event="attack">Attack (${player.attack_power} damage)</button>
    <button event="defend">Defend (+${player.defense_bonus} defense)</button>
    $if(player.mana >= 10) {%
      <button event="cast_spell">Cast Fireball (10 mana)</button>
    %}
    <button event="try_flee">Attempt to Flee</button>
  </div>
  ```

  on_attack: (card) => {
    const enemy = card.scene.enemy;

    const damage = Math.max(1, $player.attack_power - enemy.defense);
    enemy.health -= damage;

    if (enemy.health <= 0) {
      return RezEvent.playCard("victory");
    } else {
      return RezEvent.playCard("enemy_turn").flash(`You deal ${damage} damage!`);
    }
  }

  on_defend: (card) => {
    $player.temp_defense = $player.defense_bonus;
    return RezEvent.playCard("enemy_turn").flash("You prepare to defend!");
  }

  on_cast_spell: (card) => {
    const enemy = card.scene.enemy;

    $player.mana -= 10;
    const damage = 15;
    enemy.health -= damage;

    if(enemy.health <= 0) {
      return RezEvent.playCard("victory");
    } else {
      return RezEvent.playCard("enemy_turn").flash(`Your fireball deals ${damage} damage!`);
    }
  }

  on_try_flee: (card) => {
    const flee_ability = 0.5 * (($player.sneak - 7.5) / 7.5);
    const flee_chance = 0.5 + flee_ability;
    if (Math.random() < flee_chance) {
      return RezEvent.switchScene("overworld").flash("You successfully escape!");
    } else {
      $player.temp_defence = -5;
      return RezEvent.playCard("enemy_turn").flash("You couldn't escape!");
    }
  }
}

@card enemy_turn {
  content: ```
  <p>${enemy.name} attacks!</p>
  <button event="continue">Continue</button>
  ```

  on_continue: (card) => {
    const enemy = card.scene.enemy;

    const damage = Math.max(1, enemy.attack_power - ($player.defense + ($player.temp_defense || 0)));
    player.health -= damage;
    player.temp_defense = 0; // Reset temporary defense

    if (player.health <= 0) {
      return RezEvent.playCard("defeat");
    } else {
      return RezEvent.playCard("combat_start").flash(`${enemy.name} deals ${damage} damage to you!`);
    }
  }
}

@card victory {
  content: ```
  <h3>Victory!</h3>
  <p>You have defeated the ${enemy.name}!</p>
  <p>You gain ${enemy.experience_reward} experience and ${enemy.gold_reward} gold.</p>
  <button scene="overworld">Continue your adventure</button>
  ```

  on_start: (card) => {
    const enemy = card.scene.enemy;
    player.experience += enemy.experience_reward;
    player.gold += enemy.gold_reward;
  }
}

@actor player {
  $global: true
  name: "Hero"
  health: 100
  max_health: 100
  health_perc: ^p{
    return this.health * 100 / this.max_health;
  }
  mana: 50
  attack_power: 15
  defense: 5
  defense_bonus: 3
  experience: 0
  gold: 0
}

@actor goblin {
  $global: true
  name: "Goblin"
  health: 30
  max_health: 30
  health_perc: ^p{
    return this.health * 100 / this.max_health;
  }
  attack_power: 8
  defense: 2
  experience_reward: 25
  gold_reward: 10
}
This combat system demonstrates:
-
Dynamic health bars using CSS and template expressions
-
Conditional action availability based on resources (mana)
-
Bindings flowing down from scene to card
-
Dynamic properties
-
Event-driven gameplay with multiple outcomes
-
State management across multiple cards
-
Visual feedback through flash messages
Part 4: Advanced Features
Custom Elements and Mixins
As your games grow more complex, you’ll want to create your own element types and reusable components.
Creating Custom Elements
Use @elem to define new element types based on existing ones:
@elem npc = actor

@npc village_guard {
  name: "Guard"
  occupation: "Village Protector"
  dialogue: "Halt! State your business."
}
This creates a new @npc element type that inherits all the properties of @actor but can have its own defaults and behaviors.
Adding Default Attributes
Use @defaults to give custom elements standard attributes:
@elem monster = actor

@defaults monster {
  hostile: true
  experience_reward: 10
  gold_reward: 5
  behavior_pattern: :aggressive
}

@monster goblin {
  name: "Goblin Warrior"
  health: 25
  attack_power: 8
  // Inherits: hostile: true, experience_reward: 10, etc.
}
Mixins for Shared Behavior
Mixins let you share common attributes across different element types:
@mixin combat_capable {
  health: 100
  max_health: 100
  attack_power: 10
  defense: 5

  take_damage: function(amount) {
    this.health = Math.max(0, this.health - amount);
    return this.health <= 0;
  }

  heal: function(amount) {
    this.health = Math.min(this.max_health, this.health + amount);
  }
}

@elem warrior = actor<#combat_capable>
@elem guardian = actor<#combat_capable>

@warrior player_character {
  name: "Hero"
  // Automatically gets all combat_capable attributes and methods
}
Multiple mixins can be combined:
@mixin magic_user {
  mana: 50
  max_mana: 50
  spell_power: 12
}

@elem battle_mage = actor<#combat_capable, #magic_user>
Behavior Trees
For complex NPC AI and game logic, Rez includes a powerful behavior tree system. Behavior trees let you create sophisticated, reactive AI without writing complex JavaScript.
Basic Behavior Tree Concepts
Behavior trees are composed of nodes that either succeed or fail:
-
Composite nodes coordinate multiple child behaviors
-
Condition nodes test the game state
-
Action nodes modify the game state
@actor smart_guard {
  name: "Intelligent Guard"

  behaviors: ^[
    $select
      [$sequence
        [player_nearby range=3]
        [guard_not_alerted]
        [set_alert_level level=1]]
      [$sequence
        [alert_level_equals level=2]
        [call_for_backup]]
      [patrol_route]
  ]
}
Core Behavior Types
$select - Try children until one succeeds (OR logic):
behaviors: ^[
  $select
    [has_weapon]      // Try this first
    [find_weapon]     // If no weapon, try to find one
    [flee_combat]     // Last resort: run away
]
$sequence - All children must succeed (AND logic):
behaviors: ^[
  $sequence
    [see_enemy]       // First, spot an enemy
    [weapon_ready]    // Then, make sure weapon is ready
    [attack_enemy]    // Finally, attack
]
$parallel - Run multiple behaviors simultaneously:
behaviors: ^[
  $parallel
    [patrol_area]     // Keep patrolling
    [watch_for_threats] // While watching for danger
]
Writing Custom Behaviors
Create your own condition and action behaviors:
@behaviour player_nearby {
  options: ["range"]
  execute: function(owner, behaviour, wmem) {
    const range = behaviour.option("range");
    const distance = owner.distanceTo($("player"));

    return {
      success: distance <= range,
      wmem: wmem
    };
  }
}

@behaviour set_alert_level {
  options: ["level"]
  execute: function(owner, behaviour, wmem) {
    const level = behaviour.option("level");
    owner.alert_level = level;

    return {
      success: true,
      wmem: wmem
    };
  }
}
Complex AI Example
Here’s a sophisticated NPC that reacts to the player and environment:
@actor tavern_keeper {
  name: "Bartender Bob"
  mood: :neutral
  reputation_with_player: 0
  last_interaction: 0

  behaviors: ^[
    $select
      // Emergency responses
      [$sequence
        [tavern_on_fire]
        [evacuate_tavern]]

      // Player interactions
      [$sequence
        [player_at_bar]
        [$select
          [$sequence
            [player_reputation_high]
            [greet_warmly]]
          [$sequence
            [player_reputation_low]
            [greet_coldly]]
          [greet_neutrally]]]

      // Idle behaviors
      [$sequence
        [no_customers_present]
        [$select
          [clean_glasses]
          [restock_bottles]
          [count_money]]]

      // Default: serve customers
      [serve_random_customer]
  ]
}

@behaviour player_at_bar {
  execute: function(owner, behaviour, wmem) {
    const player_location = $("player").current_location;
    return {
      success: player_location === "tavern_bar",
      wmem: wmem
    };
  }
}

@behaviour greet_warmly {
  execute: function(owner, behaviour, wmem) {
    const greetings = [
      "Welcome back, friend! The usual?",
      "Good to see you again! What can I get you?",
      "My favorite customer! What brings you here today?"
    ];

    owner.current_dialogue = greetings.randomElement();
    $("game").trigger_event("npc_speaks", {npc: owner, text: owner.current_dialogue});

    return {success: true, wmem: wmem};
  }
}
Custom Scripts and Styles
Extend Rez with your own JavaScript functions and CSS styling.
Adding Custom JavaScript
Use @script to add utility functions:
@script {
  // Dice rolling utilities
  function rollDie(sides) {
    return Math.floor(Math.random() * sides) + 1;
  }

  function rollDice(count, sides, modifier = 0) {
    let total = modifier;
    for (let i = 0; i < count; i++) {
      total += rollDie(sides);
    }
    return total;
  }

  // Combat calculation helpers
  function calculateDamage(attacker, defender) {
    const baseDamage = rollDice(2, 6) + attacker.strength_modifier;
    const mitigatedDamage = Math.max(1, baseDamage - defender.armor_class);
    return mitigatedDamage;
  }
}
Adding Custom CSS
Use @stylesheet to style your game:
@stylesheet {
  .character-sheet {
    border: 2px solid #8B4513;
    border-radius: 10px;
    padding: 20px;
    background: linear-gradient(135deg, #F5E6D3, #E8D5B7);
    box-shadow: 0 4px 8px rgba(0,0,0,0.3);
  }

  .health-bar {
    width: 100%;
    height: 20px;
    background-color: #444;
    border: 2px solid #000;
    border-radius: 10px;
    overflow: hidden;
  }

  .health-fill {
    height: 100%;
    background: linear-gradient(90deg, #ff4444, #ffaa44, #44ff44);
    transition: width 0.3s ease;
  }

  .combat-actions button {
    background: #8B4513;
    color: white;
    border: none;
    padding: 10px 20px;
    margin: 5px;
    border-radius: 5px;
    cursor: pointer;
    font-size: 16px;
  }

  .combat-actions button:hover {
    background: #A0522D;
    transform: translateY(-2px);
  }

  .flash-message {
    background: #FFD700;
    border: 2px solid #FFA500;
    padding: 10px;
    margin: 10px 0;
    border-radius: 5px;
    text-align: center;
    font-weight: bold;
  }
}
JavaScript Patches
Extend built-in JavaScript objects with the @patch directive:
@patch {
  patch: "Array"
  method: "sample"
  impl: function(count = 1) {
    const shuffled = [...this].sort(() => 0.5 - Math.random());
    return count === 1 ? shuffled[0] : shuffled.slice(0, count);
  }
}

// Now you can use:
// ["red", "green", "blue"].sample()  -> "green"
// [1,2,3,4,5].sample(3)  -> [3, 1, 5]
Custom Template Filters
Create your own template expression filters:
@filter DICE_ROLL_FILTER {
  name: "roll"
  impl: (dice_notation) => {
    // Parse "2d6+3" format
    const match = dice_notation.match(/(\d+)d(\d+)(?:\+(\d+))?/);
    if (!match) return 0;

    const count = parseInt(match[1], 10);
    const sides = parseInt(match[2], 10);
    const modifier = parseInt(match[3], 10) || 0;

    return rollDice(count, sides, modifier);
  }
}

// Use in templates:
// <p>You rolled ${"2d6+3" | roll} damage!</p>
Building Modular Game Systems
For large games, organize your code into modular systems:
// combat_system.rez
@script {
  const CombatSystem = {
    initiateCombat(player, enemy) {
      $("game").combat_state = {
        player: player,
        enemy: enemy,
        turn: "player",
        round: 1
      };
      return RezEvent.switchScene("combat");
    },

    processTurn(action, target) {
      const state = $("game").combat_state;
      // Process combat logic...
      return this.checkCombatEnd(state);
    },

    checkCombatEnd(state) {
      if (state.player.health <= 0) {
        return RezEvent.playCard("player_defeated");
      } else if (state.enemy.health <= 0) {
        return RezEvent.playCard("enemy_defeated");
      }
      return RezEvent.render();
    }
  };
}

// inventory_system.rez
@script {
  const InventorySystem = {
    addItem(character, item) {
      if (!character.inventory) character.inventory = [];
      character.inventory.push(item);
      this.sortInventory(character);
    },

    removeItem(character, itemId) {
      if (!character.inventory) return false;
      const index = character.inventory.findIndex(item => item.id === itemId);
      if (index >= 0) {
        character.inventory.splice(index, 1);
        return true;
      }
      return false;
    },

    sortInventory(character) {
      character.inventory.sort((a, b) => {
        // Sort by type, then by name
        if (a.type !== b.type) return a.type.localeCompare(b.type);
        return a.name.localeCompare(b.name);
      });
    }
  };
}
Part 5: Technical Reference
How Rez Works Under the Hood
Understanding Rez’s compilation and runtime process helps you debug issues and optimize your games.
The Compilation Process
When you run rez compile, several steps occur:
-
Parse Source Files - Rez reads your
.rezfiles and parses the element definitions -
Validate References - Checks that element references (like
#player) point to existing elements -
Generate JavaScript - Converts elements into JavaScript objects and classes
-
Template Compilation - Transforms template expressions into rendering functions
-
Asset Processing - Copies assets and generates asset manifests
-
Runtime Assembly - Combines everything into
runtime.jsandindex.html
Runtime Object Model
Your Rez elements become JavaScript objects at runtime:
-
@game→RezGameinstance -
@scene→RezSceneinstance -
@card→RezCardinstance -
@actor→RezActorinstance -
And so on…
Each object gets methods and properties based on the attributes you defined:
@actor hero {
  name: "Brave Knight"
  health: 100

  heal: function(amount) {
    this.health += amount;
  }
}

// Becomes at runtime:
const hero = new RezActor({
  id: "hero",
  name: "Brave Knight",
  health: 100,
  heal: function(amount) {
    this.health += amount;
  }
});
The Rendering Pipeline
Content rendering follows this flow:
-
Game Layout renders with scene content in
${content} -
Scene Layout renders with card content in
${content} -
Card Content renders with template expressions resolved
-
Blocks (if any) render and provide additional template variables
Each level wraps the next in HTML structure:
<div class="game">                    <!-- Game wrapper -->
  <!-- Game layout content -->
  <div class="scene" id="scene_forest"> <!-- Scene wrapper -->
    <!-- Scene layout content -->
    <div class="card" id="card_clearing"> <!-- Card wrapper -->
      <!-- Card content -->
    </div>
  </div>
</div>
Memory and Performance
Global Objects: Elements with $global: true become window variables:
@actor player {
  $global: true
  name: "Hero"
}

// Accessible as: window.$player or just $player
Template Caching: Template rendering functions are compiled once and cached for performance.
Event Delegation: Rez uses event delegation for clicks, so dynamically added content automatically works.
Complete Attribute Type Reference
Primitive Types
Boolean
visible: true
completed: false
enabled: yes     // yes/no also work
hidden: no
Number
count: 42
price: 19.99
temperature: -10
percentage: 0.85
String
name: "Magic Sword"
description: "A blade that glows with inner light"
note: ""  // Empty string
Keyword
type: :weapon
rarity: :legendary
status: :active
category: :consumable
Complex Types
Element Reference
owner_id: #player
location_id: #forest_clearing
target_id: #dragon
List (space-separated, no commas)
colors: [:red :green :blue]
scores: [100 250 75 420]
items: [#sword #shield #potion]
mixed: ["text" 42 :keyword #reference]
Set (unique values, unordered)
tags: #{:magical :rare :weapon}
visited_locations: #{#town #forest #cave}
Template (multi-line with expressions)
content: ```
<h2>${title}</h2>
<p>Welcome, ${player.name}!</p>
$if(player.level > 5) {%
  <p>You are an experienced adventurer.</p>
%}
```
Binding List (key-value pairs)
bindings: [
  player: #main_character,
  location: () => player.current_location,
  gold: &player.gold
]
Dynamic Types
-
Dynamic Initializer** (calculated during intialization, static thereafter) When you want to initialize an attribute value with a dynamic value but have it remain the same thereafter you can use a dynamic initializer
^i{}.
An initializer should contain Javascript to return the value that becomes the attributes initial value at runtime.
Thereafter the attribute is equivalent to a statically declared value and can be changed or replaced as normal.
You may optionally specify a priority 1-10 for the initializer, :n, that determines
when it runs relative to other initializers. If left unspecified initializers
get priority 10, the lowest priority.
@object treasure_horde {
  gold: ^i:1{return Math.rand_int_between(20, 50);}
  silver: ^i:2{return Math.rand_int_between(this.gold, 200);}
  copper: ^i{return Math.rand_int_between(this.silver, 1000);}
}
In the example the gold initializer has priority 1 and runs first. This means
that when the silver initializer runs at priority 2 the object has its
gold property set and it can depend upon that value. The copper initializer
runs at the default priority of 10 which guarantees that the silver value
is avialable.
Note that initializers must return a value. The runtime turns initializers into
functions run during game initialization. During an initializer the value of
this is the element whose attribute value is being initialized.
Dynamic Property (calculated on each access)
When you want to create an attribute who value is computed dynamically each
time it is referenced use a ^p{} property.
A property should contain Javascript code to return the value that the caller will receive when they reference the named attribute.
@actor player {
  movement_speed: ^p{
    let speed = this.base_speed || 30;
    if (this.is_encumbered) speed = Math.floor(speed / 2);
    if (this.hasCondition?.("haste")) speed *= 2;
    if (this.hasCondition?.("slow")) speed = Math.floor(speed / 2);
    return Math.max(0, speed);
  }
}
In this example whenever player.speed is requested it will be recalculated and that value returned.
@card c_player_run {
  bindings: [
    player: #player
  ]

  content: ```
  <p>Your character can run at ${player.speed} meters per second.</p>
  ```
}
Delegate Lookup (referenced in a component element)
When you want to simplify how you refer to an attribute in a composed element,
use a ^d:attr property.
@actor player {
  spells_cast: ^d:spell_book

  spell_book_id: #player_spell_book
}

@object player_spell_book {
  spells_cast: 0
}
In the example we can refer directly to player.spells_cast and it will forward
that to its spell_book attribute which should be an element reference attribute
of the same element.
This is a syntactic sugar that is equivalent to player.spell_book.spells_cast.
Copy Initializer (copies an element template)
When you want to compose two elements by assigning a copy of a template element
to an attribute use the ^c:#<id_ref> copy initializer.
During initialization the specified element will be copied and added to the game and the id of the copy will be assigned to the named attribute.
You may optionally specify a priority 1-10 for the copy initializer, :n, that
determines when it runs relative to other initializers. If left unspecified copy
initializers get priority 10, the lowest priority.
@item sword_template {
  $template: true
  damage: ^i{return Math.rand_int_between(6, 8)}
  name: "Iron Sword"
}

@actor player {
  weapon_id: ^c:#sword_template
}
During initialization sword_template will be copied and the id of the copy
will be assigned to the player weapon_id. From that point player.weapon
will refer to the specific copy and not the template.
The copy process sets $template: false on the new object and adds a
$original_id attribute containing the id of the source element. Any
initializers on the copied element (such as the damage initializer above)
will run during the copy, so each copy gets its own independent values.
After copying, the copy event fires on the new object with {original: <source>}
allowing custom post-copy setup.
@item weapon_template {
  $template: true
  on_copy: (obj, evt) => {
    console.log(`Created ${obj.id} from ${evt.original.id}`);
  }
}

@actor hero {
  main_hand_id: ^c:1:#weapon_template
  off_hand_id: ^c:2:#weapon_template
}
In this example, main_hand_id has priority 1 and initializes first, then
off_hand_id at priority 2. Each gets an independent copy of the template.
Note: Copy initializers run before delegate (^d) and dynamic (^i) initializers,
so copied elements are available when those initializers execute.
Dice Notation
damage: ^r:2d6+3      // Roll 2 six-sided dice, add 3
treasure: ^r:d100     // Roll 1 hundred-sided die
healing: ^r:1d4+1     // Roll 1 four-sided die, add 1
Probability Table
loot_type: |:common 60 :uncommon 25 :rare 10 :legendary 5|
encounter: |#goblin 40 #orc 30 #troll 20 #dragon 10|
weather: |"sunny" 50 "cloudy" 30 "rainy" 15 "stormy" 5|
Script Types
Event Script (arrow function, receives object and event)
on_use: (item, event) => {
  player.health += item.healing_power;
  return RezEvent.flash("You feel better!");
}

on_enter: (scene, event) => {
  scene.visit_count = (scene.visit_count || 0) + 1;
  return RezEvent.render();
}
Action Script (regular function, this is the owner object)
attack: function(target) {
  const damage = this.attack_power + rollDie(6);
  target.health -= damage;
  return damage;
}

canAfford: function(price) {
  return this.gold >= price;
}
Behavior Tree
behaviors: ^[
  $select
    [$sequence
      [health_low]
      [has_potion]
      [use_potion]]
    [$sequence
      [enemy_nearby]
      [attack_enemy]]
    [wander_around]
]
Special Attributes
System Attributes (control Rez behavior)
$global: true          // Create global variable
$template: true        // Mark as template for copying
$js_ctor: "CustomClass" // Use different JavaScript constructor
$built_in: true        // Mark as built-in (documentation only)
ID Suffix Attributes (automatic element references)
Rez implements a built in behaviour when it sees an attribute whose name has
the _id suffix. This suffix declares the attribute to be a reference to an
element with the corresponding id.
@actor player {
  nemesis_id: #villain_1
}
This declares that the nemesis_id attribute has the value #villain_1 however,
during initialization, Rez will also add a nemesis attribute to the player
element which will be a reference to the villain_1 element.
@actor villian_1 {
  name: "Suruman of Many Colours"
}

@card c_player_nemesis {
  bindings: [
    player: #player
  ]
  content: ```
  <p>Your current nemesis is ${player.nemesis.name}.</p>
  ```
}
You may, later, assign a new id to the nemesis_id attribute to update the
reference or assign an element reference to the nemesis attribute.
@actor villain_2 {
  name: "Sauron"
}

@actor player {
  on_return_of_the_king: (player) => {
    // These two lines are equivalent
    player.nemesis_id = "villain_2";
    player.nemesis = $("villain_2");
  }
}
In the background, all references to the nemesis attribute transparently look
up the value of the related nemesis_id attribute, and then the Javascript
reference for the element with that id.
If nemesis_id is set to an invalid id value references to the nemesis
property will raise an exception. Likewise setting the nemsis attribute to
a Javascript object without an id attribute will raise an exception. Note
that you should only assign references to elements to such properties.
Assigning an object that happens to have an id property will work but later
cause undefined errors.
Miscellaneous Topics
Including custom Javascript
To include a custom Javascript file into your game add the .js file to your assets folder and a corresponding @asset element to your game. Use the $js_runtime attribute to tell Rez that it should be included in the runtime.js file.
@asset custom_js {
  file: "custom.js"

  $js_runtime: true
}
To have a Javascript file included as a separate file, included before runtime.js, use $pre_runtime: true.
To apply the defer attribute to the corresponding <script> tag use $js_defer: true.
Using @object
Rez defines a number of generally useful elements like @actor, @item, @inventory, @scene and so forth. These elements have built-in behaviours designed to be useful but flexible.
However, there may be concepts in your game which don’t map to those predefined categories,
for example "classes" in an RPG. There are so many possible ways to have a class work in a game that Rez cannot really offer a useful starting point. For this type of situation there is @object.
The @object element allows you to create a fully-custom object that has no built-in behaviours (beyond what you get from the basic_object runtime prototype that all in-game objects share).
Let’s look at an example:
@object soldier {
  specialisation: :combat
  perk_ids: #{#two_weapon_style #pounce #shield_bash #second_wind}
}

@object two_weapon_style {
  level: 3
  label: "Fight with two weapons almost as well as one"
}

@object pounce {
  level: 5
  label: "Close distance to an enemy and engage them quicker"
}

@object shield_bash {
  level: 7
  label: "Shields can be a weapon in the right hands"
}

@object second_wind {
  level: 9
  label: "When the chips are down, you come out fighting"
}

@object wizard {
  specialisation: :magic
  perk_ids: #{#fast_cast #mana_surge #concentration #max_damage}
}

@object fast_cast {
  level: 3
  label: "Faster than a speeding magic missile"
}

@object mana_surge {
  level: 5
  label: "You can always reach down for just one more spell"
}

@object concentration {
  level: 7
  label: "Nothing can distract you"
}

@object max_damage {
  level: 9
  label: "Your fireballs are the crispiest"
}

@actor thaugrim_the_wise {
  %% Code dealing with this actor can lookup available perks from
  %% the Wizards class object
  class_id: #wizard
}
How an author chooses to use these elements in their game is up to them, there are many ways that class membership & perks could be applied to in-game situations. You’d write callbacks or behaviours that make use of them. These elements can be referenced by $(<id>), the same as other elements and implement the basic_object abstraction.
Using Decisions
RezDecision is an object that doesn’t have an element. You create them when you want code (or perhaps users) to make a yes/no decision.
You can use a decision like this:
const decision = new RezDecision("Include Adult themes", {info: "Toggle this on to include themes of sex & violence that might not be suitable for all. Leave it off for a family friendly experience."});
decision.default_no();
some_function_making_the_decision(decision);
if(decision.result) {
  // do something
} else {
  // do something else
}
In this case the some_function_making_the_decision(decision) is expected to call either decision.yes() or decision.no("reason") before returning. In most cases you will be passing a decision to a script. In this case if neither function gets called the decision will default to 'no' (false). If we had used decision.default_yes() it would work the other way around.
RezDecision also supports decision.hide() which is "no, and don’t even mention it". For example
we may have a door which could be locked but also hidden. A RezDecision supports hide (player doesn’t know about it yet), no (door is locked), yes (door has been unlocked).
You can pass data into a decision either through the second argument to new RezDecision() or using the setData(key, value) API. After receiving a decision you can use the data() API to retrieve data. This way the callee can pass other information back with the decision.
Using your own prototypes
The bult in Rez prototype objects are pretty flexible but you may want to replace one of them with your own object. You can do this using the $js_ctor attribute on any object.
@actor kaspar_gutman {
  $js_ctor: "Gutman"
  name: "Kaspar Gutman"
  villain: true
end
Now, instead of using the RezActor() constructor function the initialization code will look for a Gutman() constructor function. Constructor functions are passed the id (in this case kaspar_gutman) and a map of attributes.
It is advisable to base your object on the object you are replacing.
Procedural Generation
Procedural generation is about content that is created at run-time and Rez has good support for this through it’s addCopy(), copyAssigningId() and copyWithAutoId() methods in basic_object.
Rez supports the idea that you will create 'template' elements that are designed to be copied and modified to create something new. You do this by applying the $template attribute to it and then calling the appropriate copy method.
Although most objects support copying, by specifying $template: true you will suppress some of Rez’s automatic initialization. This means that the copy will get its own initialization.
@actor T_npc {
  $template: true

  ...
end

$("T_npc").addCopy();
Best Practices and Patterns
Project Organization
Structure larger projects with clear separation:
src/
├── game.rez              # Main game definition
├── characters/
│   ├── player.rez        # Player character
│   ├── npcs.rez          # Non-player characters
│   └── monsters.rez      # Enemy creatures
├── locations/
│   ├── town.rez          # Town scenes and cards
│   ├── dungeon.rez       # Dungeon areas
│   └── overworld.rez     # World map
├── items/
│   ├── weapons.rez       # Weapon definitions
│   ├── armor.rez         # Armor and protection
│   └── consumables.rez   # Potions, scrolls, etc.
└── systems/
    ├── combat.rez        # Combat mechanics
    ├── inventory.rez     # Inventory management
    └── dialogue.rez      # Conversation system
Use the include macro to combine files:
// In game.rez
@game {
  name: "My Adventure"
  // ... game definition
}

%(characters/player.rez)
%(characters/npcs.rez)
%(locations/town.rez)
%(items/weapons.rez)
%(systems/combat.rez)
Naming Conventions
Use consistent naming patterns:
// Scenes: describe location or context
@scene forest_entrance
@scene combat_arena
@scene character_creation

// Cards: describe content or action
@card explore_clearing
@card merchant_dialogue
@card level_up_screen

// Actors: role or name
@actor village_guard
@actor evil_wizard
@actor shop_keeper

// Items: descriptive names
@item rusty_sword
@item healing_potion
@item magic_amulet
State Management
Keep game state organized and predictable:
@game {
  name: "Adventure Game"

  // Global game state
  current_chapter: 1
  player_score: 0
  game_flags: {}

  // Helper methods for state
  setFlag: function(name, value = true) {
    this.game_flags[name] = value;
  }

  getFlag: function(name) {
    return this.game_flags[name] || false;
  }

  addScore: function(points) {
    this.player_score += points;
    if (this.player_score >= 1000) {
      this.setFlag("high_score_achieved");
    }
  }
}
Error Handling
Handle edge cases gracefully:
@card examine_item {
  bindings: [
    target_item: () => {
      const itemId = $("game").selected_item_id;
      return itemId ? $(itemId) : null;
    }
  ]
  content: ```
  $if(target_item) {%
    <h3>${target_item.name}</h3>
    <p>${target_item.description}</p>
    <button event="use_item">Use Item</button>
  %}, {%
    <p>No item selected to examine.</p>
    <button card="inventory">Back to Inventory</button>
  %}
  ```
}
Performance Tips
-
Use Global Sparingly: Only mark frequently-accessed objects as global
-
Optimize Templates: Avoid complex calculations in template expressions
-
Choose the Right Dynamic Type: Match the attribute type to your use case
-
Cache Expensive Operations: Store calculated values rather than recalculating
-
Batch DOM Updates: Use
{render: true}to refresh all content at once
Choosing Between Dynamic Types:
// Use ^p{} for values that change frequently and need to be current
health_percentage: ^p{return this.health * 100 / this.max_health;}

// Use ^i{} for complex setup that rarely changes
starting_equipment: ^i{
  return this.character_class === "warrior"
    ? ["sword", "shield", "armor"]
    : ["dagger", "lockpicks", "cloak"];
}

// Use regular attributes for values that change manually
experience: 0  // Updated by events, not calculated

// Use ^i{} with manual updates for expensive calculations
threat_level: ^i{return this.calculateThreatLevel();}
recalculate_threat: function() {
  this.threat_level = this.calculateThreatLevel();
}
Template Optimization:
// Good: use dynamic properties to move calculations out of templates
@actor player {
  base_attack: 10
  strength: 15
  attack_power: ^p{return this.base_attack + Math.floor(this.strength / 2);}
}

content: ```
Attack Power: ${player.attack_power}
```

// Less good: calculate every time template renders
content: ```
Attack Power: ${player.base_attack + Math.floor(player.strength / 2)}
```